How to push your codes to GitHub using VSCode (visual studio code) without git

VSCode is a code editor used in writing codes for different programming languages. It has support for the git version control system. It also supports a large number of extensions. Find out more about VSCode here
Git is basically, a tool that helps developers push their codes to an online code hosting service provider known as GitHub. However, this is not all there is to git. Find out more about here or here
Github is where developers store codes, push changes to codes, and share codes online. It saves developers from the risk of losing codes in case of system crash or file lose. If you wish to know more about GitHub, check here
I assumed you already have git and VSCode installed in your system. I also assumed you have a GitHub account. But, if eventually, you don't have them, follow the links in the setup section to get them. This is a beginner-friendly article and will not cover other expanded areas involving GitHub and VSCode.
The setup
Setting up your workspace involves making sure your Git, GitHub and VSCode are all set to work together.
Install VSCode: You can download and install VSCode from here
Install Git: Here is a comprehensive guide on git installation depending on your machine
Create a GitHub Account: Here is a step-by-step guide on creating a GitHub account. When you are done with all installations. Follow the following steps to get started.
Cloning a repository
To start a cloning process, create a new repository. Follow the instructions below.
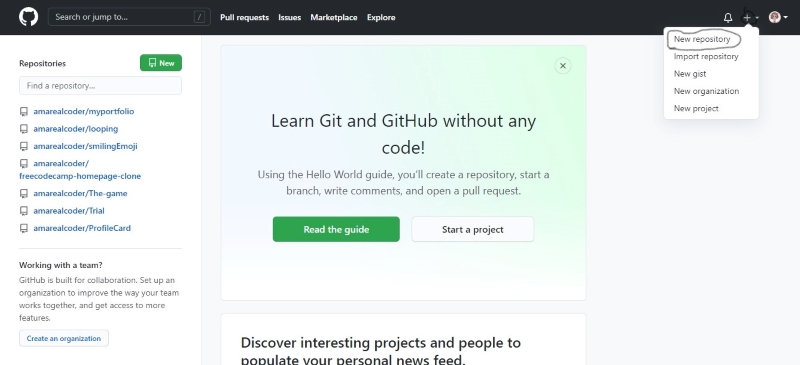
- Click on the
+sign on the top-right corner of the page. - Click on
new repositoryfrom the dropdown box.
See the image illustration below.
You will be taken to a page where you can do the following:
- Give your repository a name (You will be notified if the name you chose is valid or not).
- Set the repository to
publicorprivateas you wish (private means others can't have access to the repo unless you let them while public means others can access it without your permission). - Check the
readme.mdto create a readme file - Finally, click on
create repository.
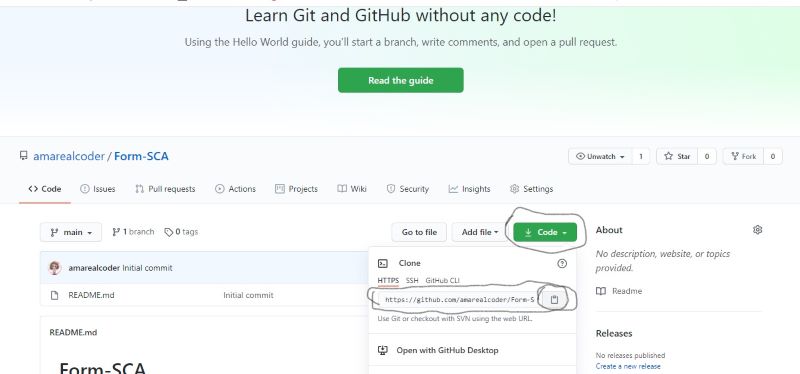
The next page has the repository's name and the readme.md file as you created it. Do the following steps:
- Click on the
codebutton. - Highlight the URL from the dropdown box.
- Press
ctrl cto copy Or click on the copy icon beside the URL.
Check the illustration image below.
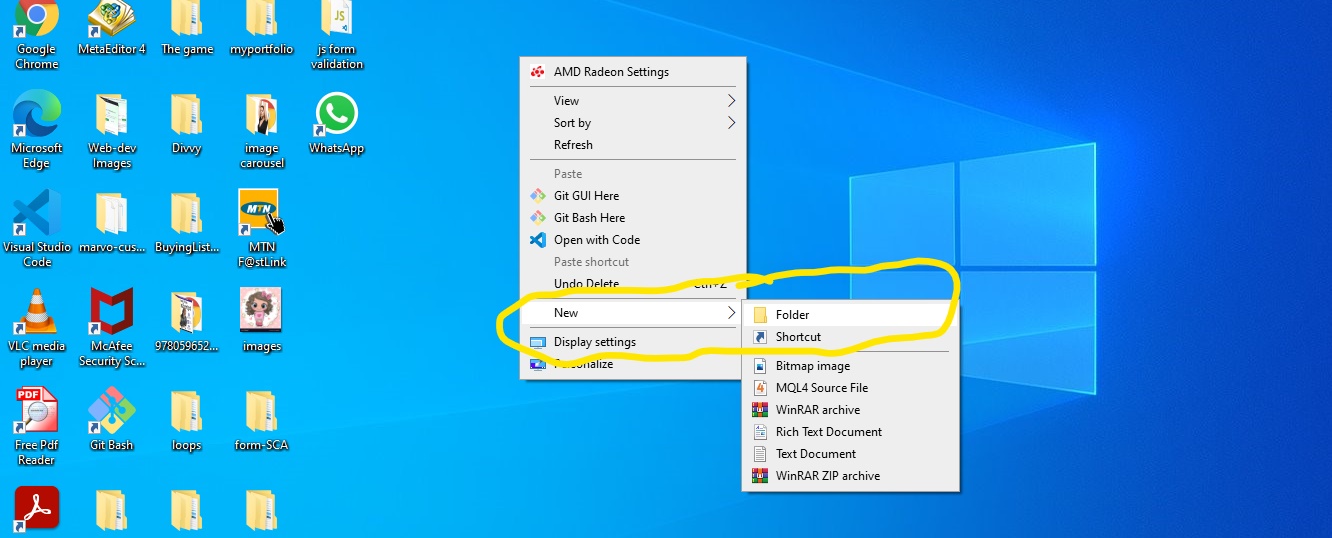
Go to your device's desktop and create a new folder for your project. Do the following steps:You can do this by
- Right-click on your desktop window.
- Go to
newon the dropdown box. - Click on
folderon the second dropdown box.
Check the illustration image below.
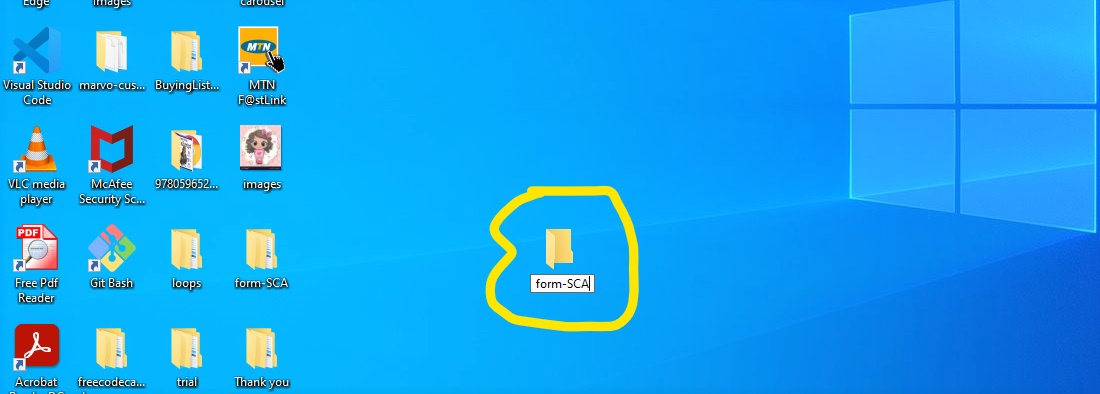
Give the folder a name ( I prefer to use the same name as that of the repository for easy identification) and press enter. This folder is what you are going to be working with in your code editor.
Check the illustration image below.
- Open your VSCode (remember you copied your repository's URL).
- Close any open folder in the code editor so it gives you the starter page.
Check the illustration image below.

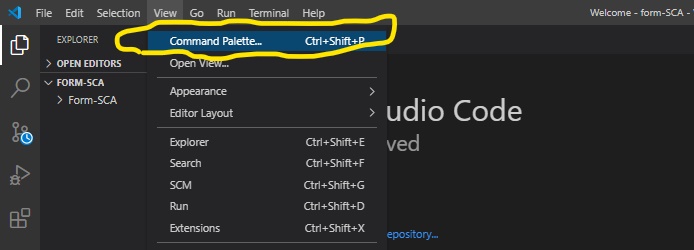
- Go to
viewon the navigation bar. - Click on
command palettein the dropdown box.
Check the illustration image below.
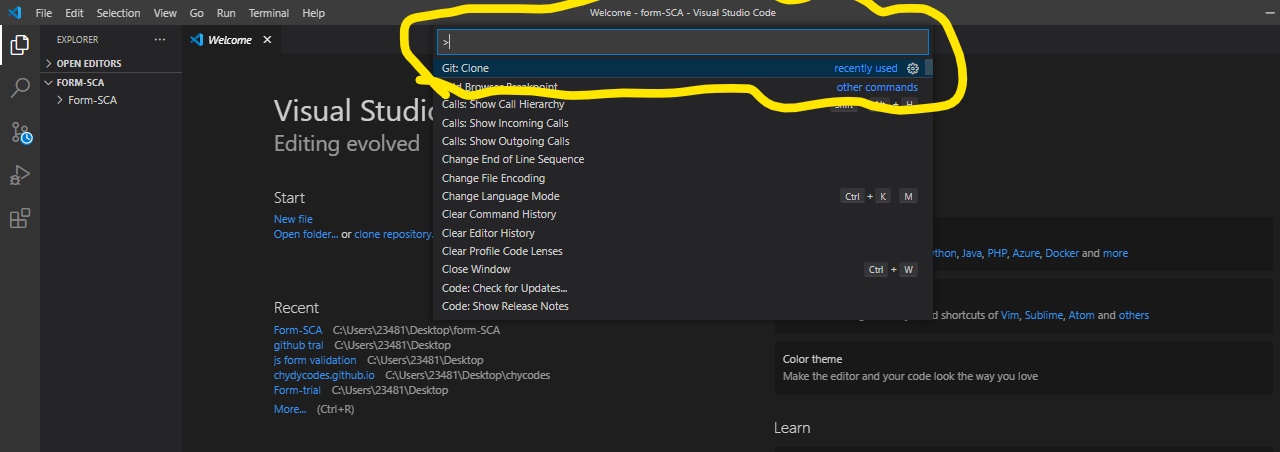
- Click on
Git: clonefrom the next dropdown box. - Paste in the previously copied repository's URL and press enter.
Check the illustration image below.
Your device's file explorer will open.
- Click on
desktopto open the folders in it. Find the folder you just created on the desktop and click on it. - Click on
Select Repository Location.
Check the illustration image below.

Notice your editor cloning the repository down the page. When its done, it will ask you 'would you like to open the cloned repository'?
Check the illustration image below.
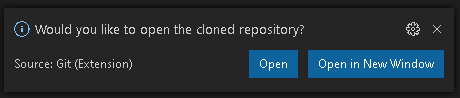
Click on open. Now you have your new folder comfortably seated in your VSCode. From here you can start creating your project files.
If you followed this far, congratulations, you just cloned a repository. You are doing great!
Create your index.html file, style.css file, and any other file you might need for your project. As you make changes to the folder, notice the git icon on the notification bar is recording every saved change made.
Staging changes
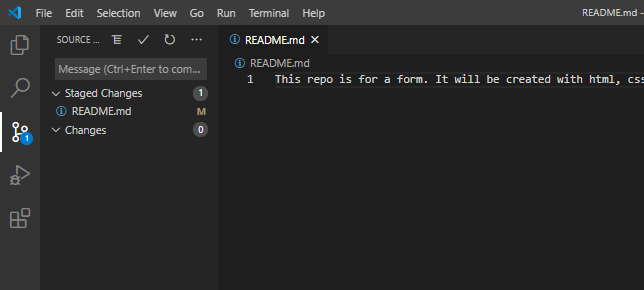
To practice how to stage changes, we will use the readme.md file which opened together with your project folder on VSCode.
Click on the
readme.mdfile. You will find it empty except for the title of your folder. Thereadme.mdfile is where you explain what your project is all about. Save your changes.Check the illustration image below.
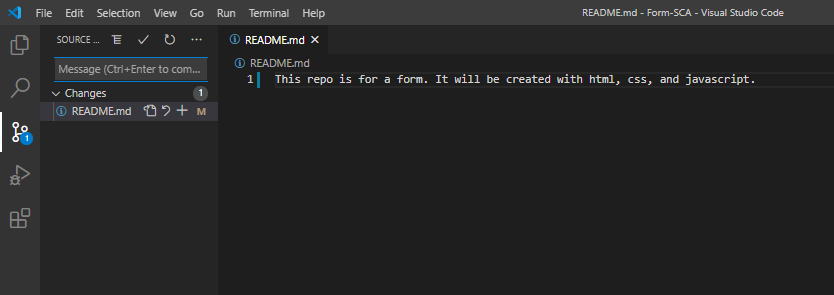
Notice the git icon on the taskbar has incorporated the changes you made to the folder. Click on the git icon and you see changes made.
Do the following steps to add the changes to staged changes.
- Click on the
+sign (Do this for all changes you want to push to GitHub). The changes are now zero.
Check the illustration image below.
Committing changes
- Click on the "three dots" on the files space.
- Take your cursor to
commitand click oncommit staged. This will bring a text area where you will type your message on the top center page. The message is where you title the changes you made for easy identification of the changes made in the files. For this sample, I will give the titleinitial commitand enter.
You have successfully committed your codes.
Check the illustration image below.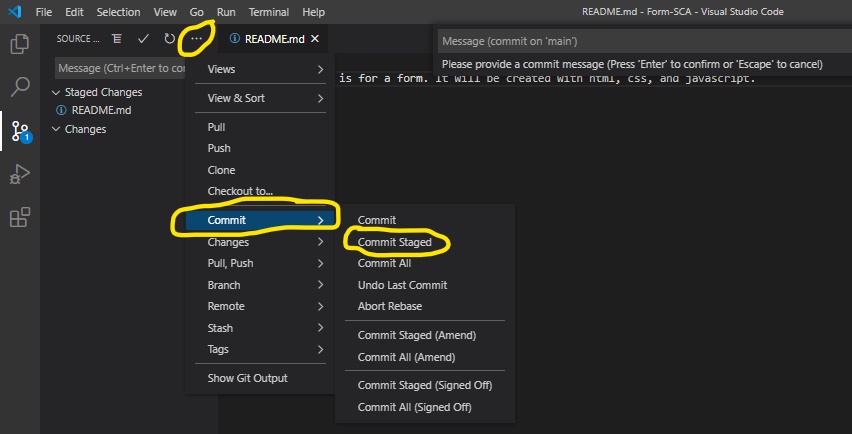
Pushing changes:
- Go back to the "three dots" again.
- Take your cursor to the
pull, pushon the dropdown box and click onpush to.
Check the illustration image below.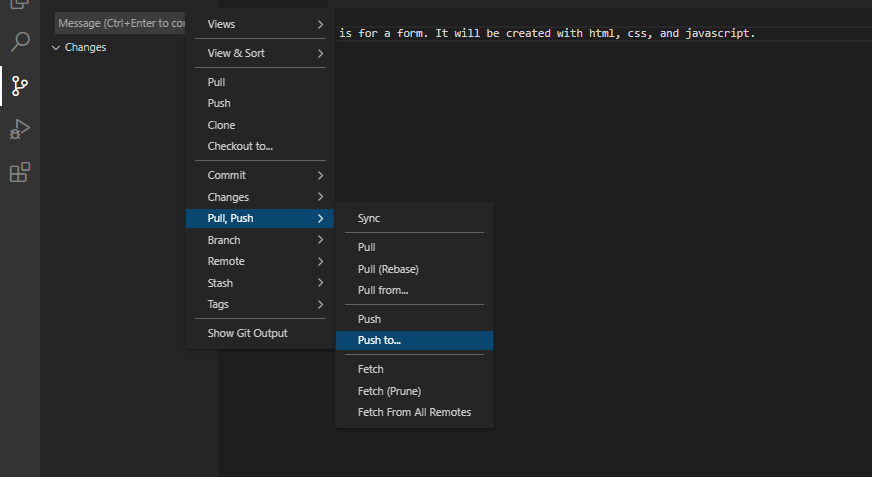
A text area comes up on the top center page, click on the URL, and there you have it! You just pushed your code!
To confirm that you have your codes successfully committed and pushed to GitHub, go back to your GitHub profile, open the repository you have been working on, and refresh the page. And there are your committed and pushed changes.
Congratulations on a job well done!
Conclusion
VSCode is a great tool for development. It has features that make life easy for developers. This process is will help developers who are not yet familiar with git command lines.
I hope this helps a fellow beginner. You can follow me on Twitter for more of such educative content.


